2000 AD Covers Uncovered – going ‘Out’ for the last time this year with Mark Harrison on Prog 2261
10th December 2021
Every week, 2000 AD brings you the galaxy’s greatest artwork and 2000 AD Covers Uncovered takes you behind-the-scenes with the headline artists responsible for our top cover art – join bloggers Richard Bruton and Pete Wells as they uncover the greatest covers from 2000 AD!
Welcome one and all, to the penultimate 2000 AD Covers Uncovered for 2021… and it’s a return to The OUT with artist Mark Harrison.
This stunning series, by Dan Adnett and Mark Harrison, has taken us further and further into the wonders of the universe with Book 2, with photo-journalist Cyd Finlea (and her sentient flatspace bag) still cataloguing the alien societies she’s been encountering but, as the series has approached the conclusion of Book 2, things are getting… well, without spoilering a fabulous ending, let’s just say they’re taking things to a whole new level here!
Mark has put a hell of a lot of work into The OUT and he’s reflecting that every time he talks process here at 2000 AD Covers Uncovered. Fittingly, for Mark’s final CU of the year, he’s gone deep, deep, deep into the final stage of putting this cover together… it’s a beauty of a cover and a monster of a CU for you. You can see it on the shelves adorning 2000 AD Prog 2261 on 8 December.

So, without further ado… Mark Harrison presents…
THE BEAUTY PASS – A look at the last stage of finessing of The OUT artwork.
MARK HARRISON: The last stage of my production line art process is to employ various actions, filters and additional art files to give the art a cinematic feel; to add “PING” to all the pages to help the images jump off the page, glow with an inner light, or dazzle with colour. It’s just a comic but in my mind, it’s a movie in static form!
So, first a quick recap on the usual stuff…
STEP 1 – The ‘scribbled rough’
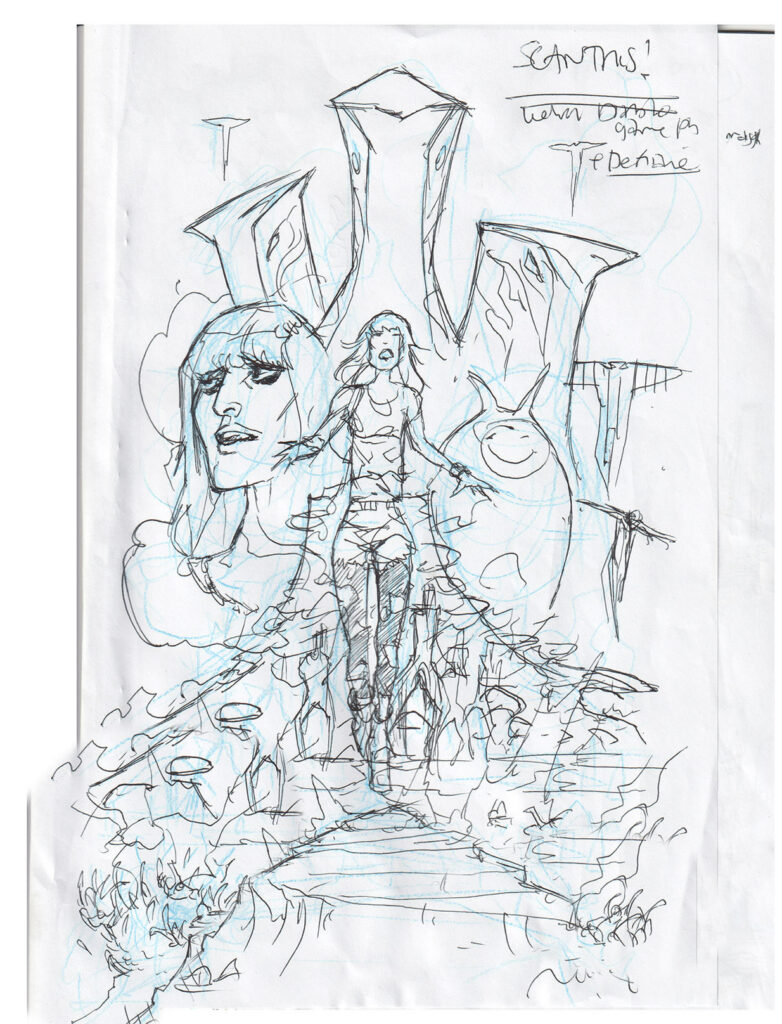
It all starts with a scribbled rough on the back of Dan’s script (the only bit done outside the computer) to get some ideas done. This is done in blue pencil, quite a fat line so I don’t get hung up on detail. I’m looking to create a sense of composition, balance negative and positive space. Finished off in spidery biro.
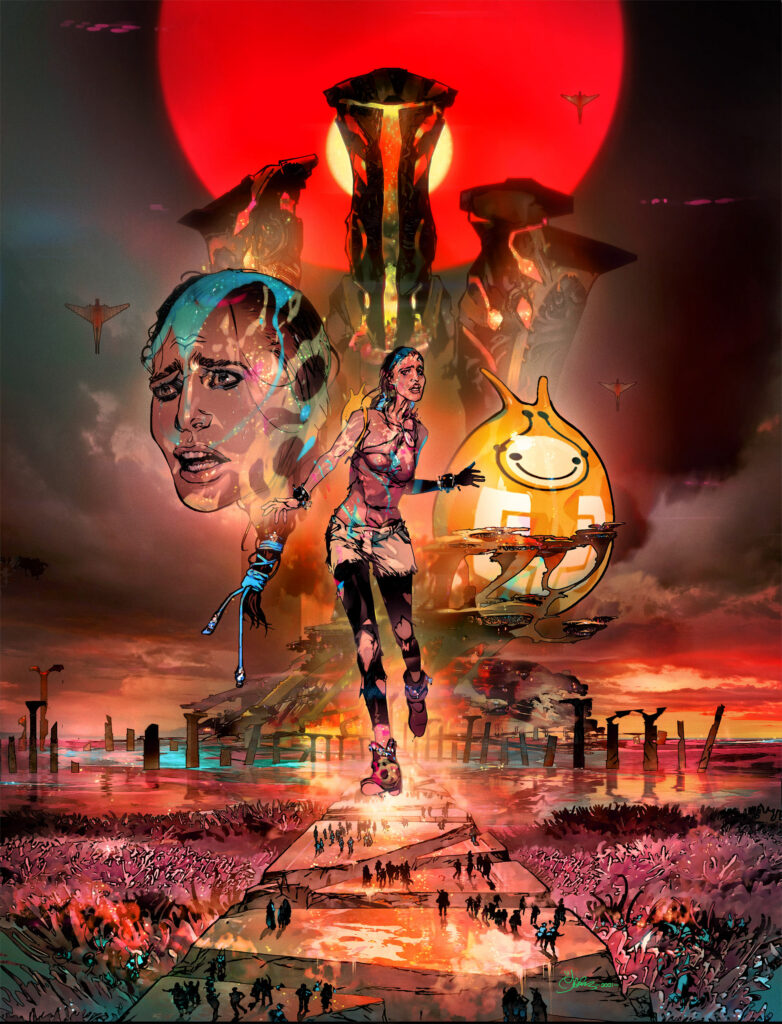
I had this idea of a film poster – full figure Cyd running towards us overlaying a biblical scene of destruction, floating heads of Cyd and Bag, a giant tree stump city in flames and the Tankinar silhouettes looking ominous behind. I’ll ‘fess up to the inspiration and references: The pose is pretty much Jessica 7( the gorgeous Jenny Agutter) from the Logan’s Run film poster. For the Tankinar I had in mind AT-AT’s in silhouette in The Empire Strikes Back. The revised headshot of Cyd (will I /won’t I add alien blood) was from my thumbnail sheet of actress Lake Bell from the film “Man Up” who has been the muse for Cyd throughout the story.

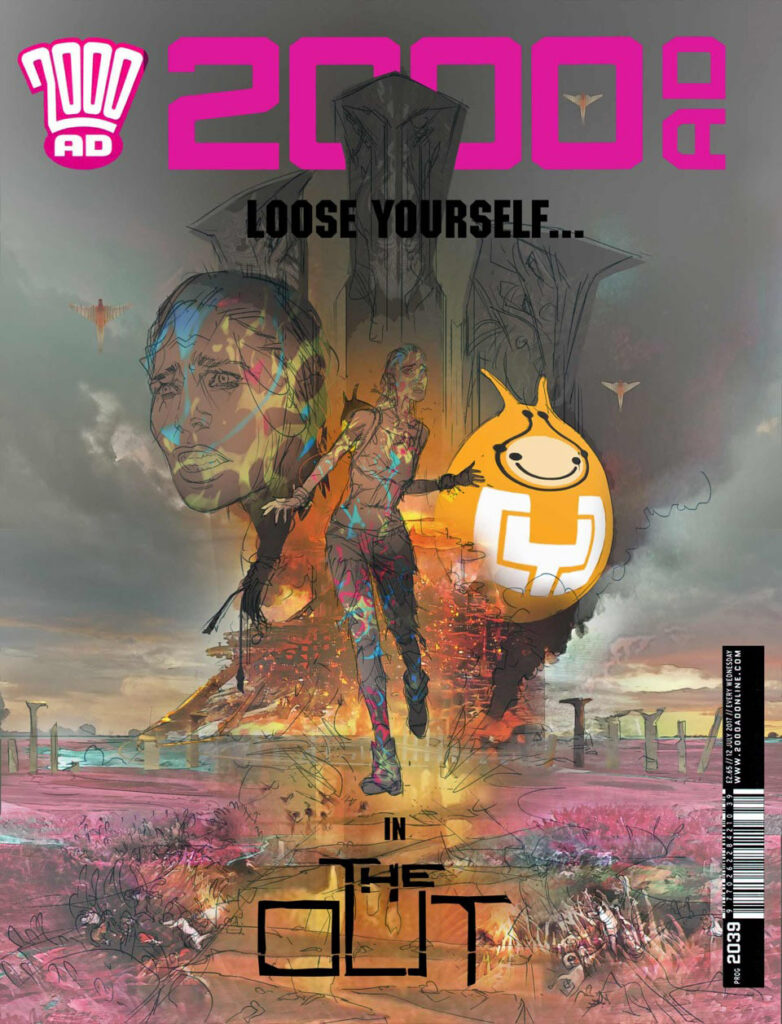
STEP 2 – The finished sketch
Elements assembled, I sent a more finished sketch off for final approval.
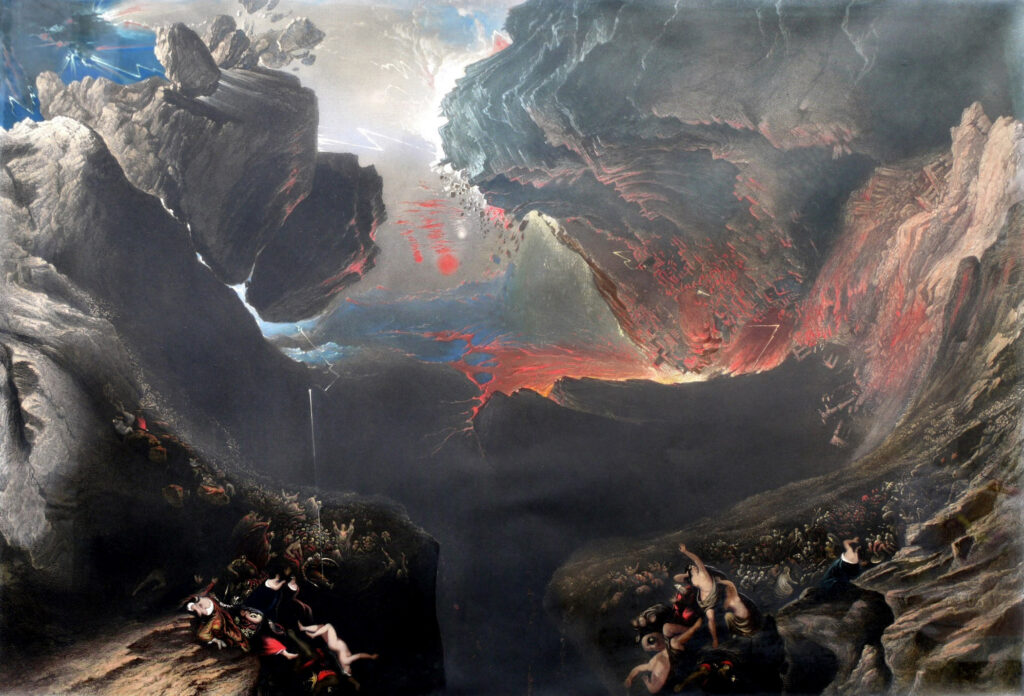
STEP 3 – At this point, I’ve added some pink weed victims
Biblical fuss and bother in the form of John Martin’s ‘The Great Day of His Wrath’. This imagery has also found its way into Glimmer Rats as well as Grey Area. It’s also the basis of the Taffy Landmass manipulation and sculpture of Lustra, but as in that episode, it kind of gets painted over in this cover.
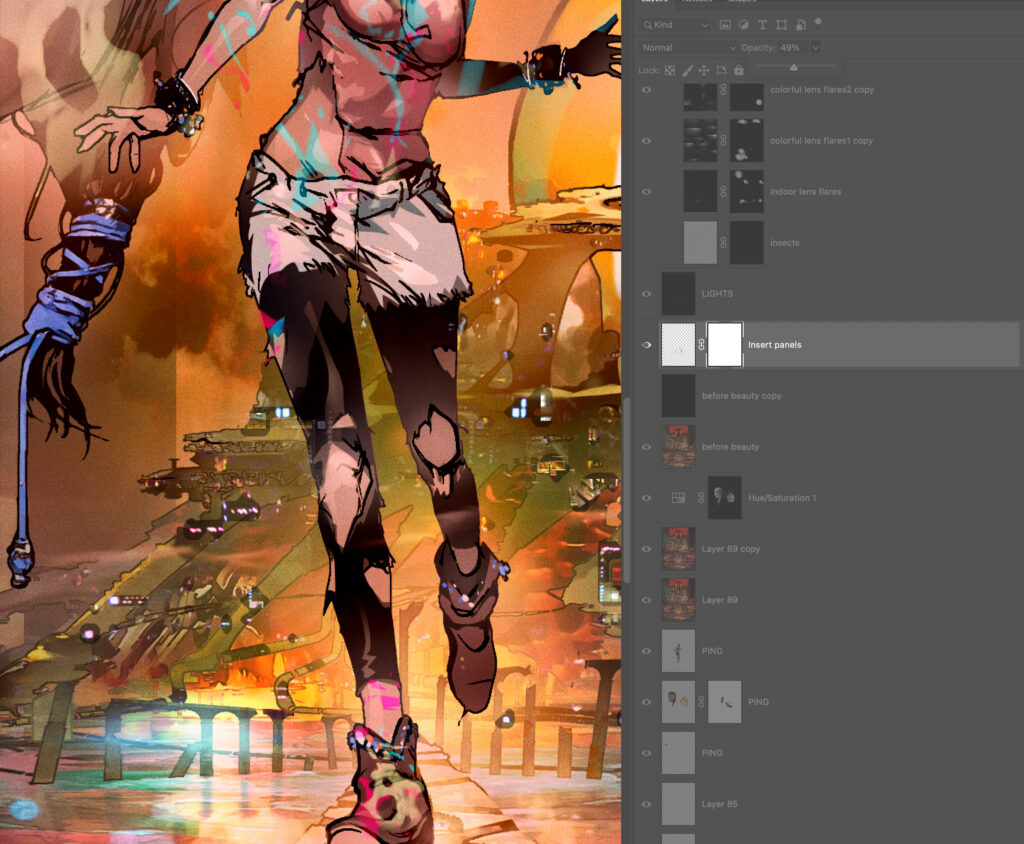
STEP 4 – Getting into the Layers and Masks
I tend to work in Layers and Layer Masks in PhotoShop, breaking the scene down into foreground, midground, and background, using their layer transparency for additional selection and editing options. (Excuse the Layer names. I get bored of “Layer this/that” and just have the actions sign off on a memorable word.)

So that shows the artwork merged to a new layer and ready for the Beauty Pass. This will be a series of a dozen or so Actions that will take the art’s tonal and hue values and use them to create effects and enhancements.
STEP 5 – Actions, Actions, Actions
This shows a snapshot of just some of my Actions. Actions, for those who don’t know, are scripts you can ‘record’ in PhopShop to playback and perform repetitive procedures saving you time and effort – most of the time. I do seem to spend an inordinate amount of time undoing or editing the effects created!
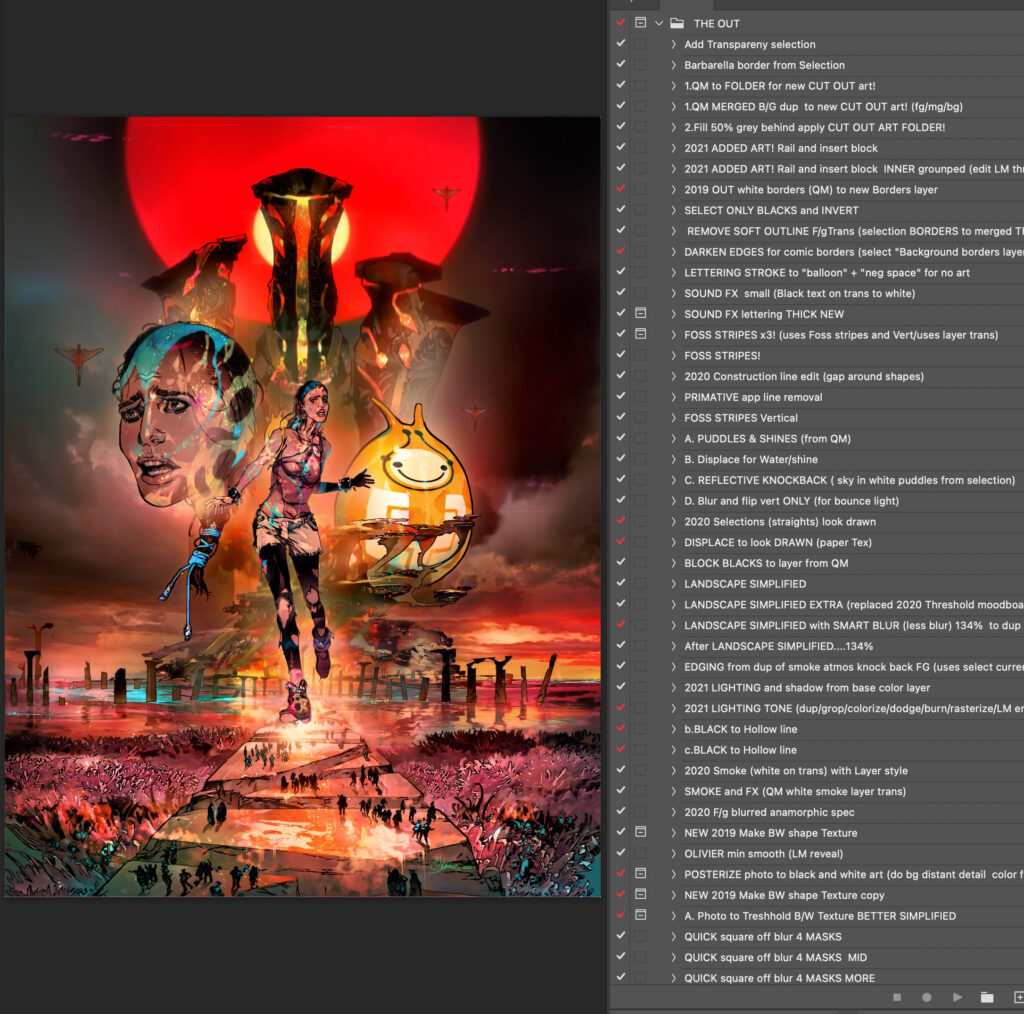
Some are named after artists that have inspired them. They number in the hundreds and are constantly being refined. Recently I had to move to a new computer, Mac operating system, AND PhotoShop version and found many of these Actions were broken! THAT was a frustrating week of fixes! But, in the long term, Actions are great time savers with predictable results – and it’s why I prefer PhotoShop over other comic art applications.
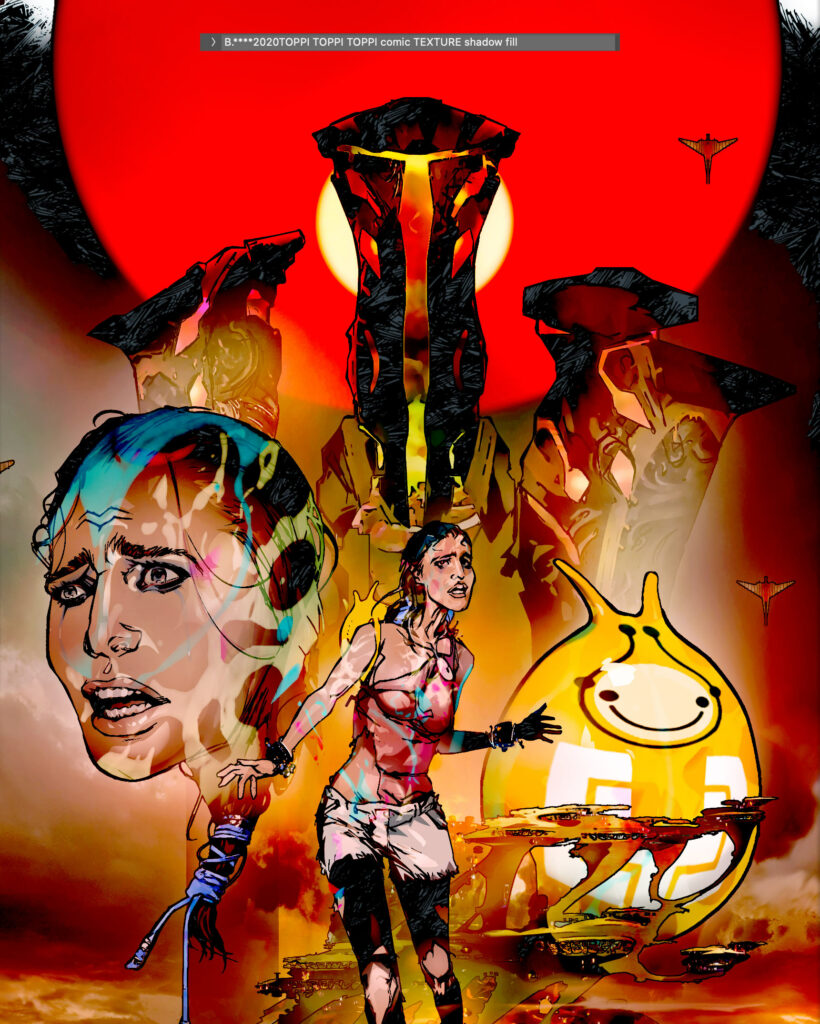
STEP 6 – The Toppi Texture
After a ‘halo’ of brightness around the main character is applied where necessary a ‘TOPPI texture’ fill is applied to the solid black inks from another document to imply a hatched texture I have slavishly worked on. This is a “cheat” just to lessen the intensity of the blacks. It’s a hatched artwork pattern based on the style of Sergio Toppi, a legendary comic artist who influenced the likes of Walt Simonson and Bill Sienkiewicz, (Marvel comic artists with a decidedly European look to their work.)
The texture is on another Layer and has a Layer Mask to paint into and reduce the effect. All the actions work on duplicate or separate layer and have layer masks as the effects usually globally affect the whole image and have to be dialed back, typically by me painting into the Layer Mask (nondestructively) and ‘hiding’ the areas the effect work. I then invert the mask to only reveal what I want. I do this A LOT.
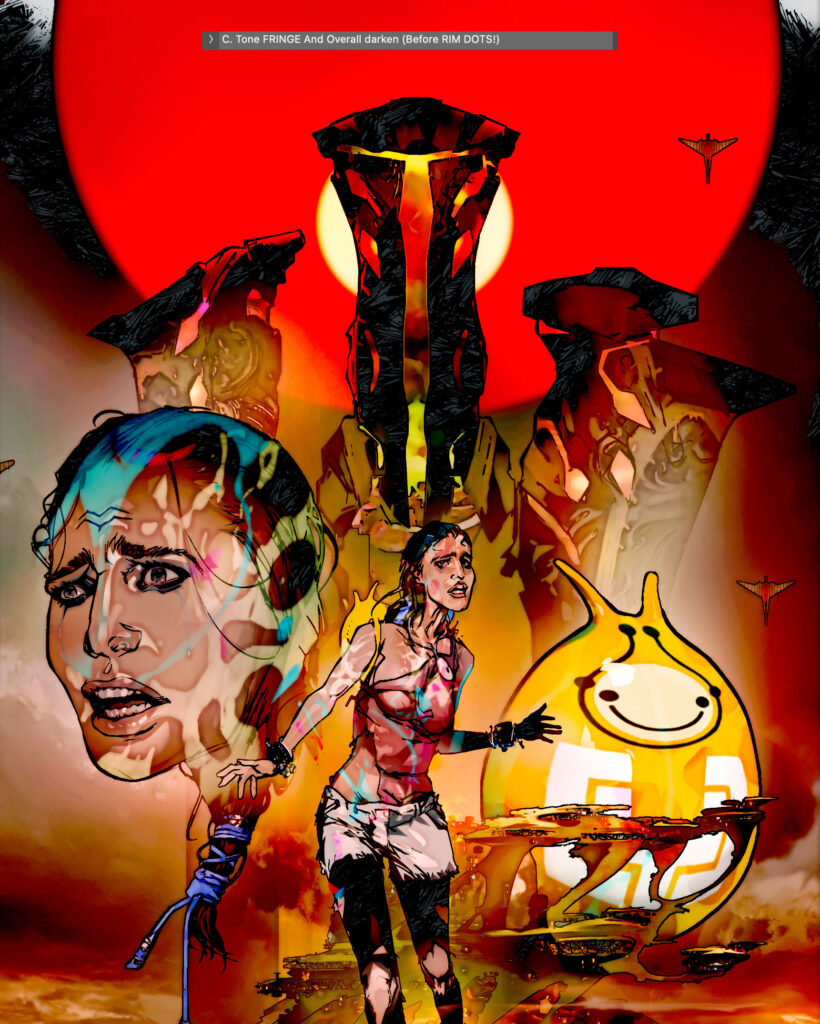
STEP 7 – Tonal Fringe
I next run an Action to create ‘Tonal Fringe’; that is to accentuate the tonal transitions around highlights. Seen here unedited and awaiting me painting into its Layer Mask.
STEP 8 – Getting Specular
Specular highlights such as sweat, spray, or airborne particles are once again taken from another document of dots. (An old starfield I used to use on Durham Red!) The Action used the arts tonal and hue information to give me a rough approximation of placement.
STEP 9 – Anamorphic Lens Blur
Now we’re are into cinematic stylings, something maybe unique to my comic art.

This is a much more complex action than it initially seems, blurring a copy of the art to create a depth of field, as if the art was photographed. A duplicate of the art is stretched into 2.35 ratio proportions and a Lens Blur filter applied. Then is compressed back to its original art size to get the elliptical bokeh lens effects seen in anamorphic films. (I’m a sucker for that look and the lens flares it creates. To me it IS movies )
STEP 10 – The Tonal Fringe and Light Patch Action
This is a late addition to the Beauty Pass list. This takes small light areas in the image and creates a halo of yellow-orange. It’s to replicate that diffused light fringing seen in dappled sunlight. I saw its effect used in Japanese Anime background paintings to capture that bloom and flare of exposure. Again, limited use gives the best effect.
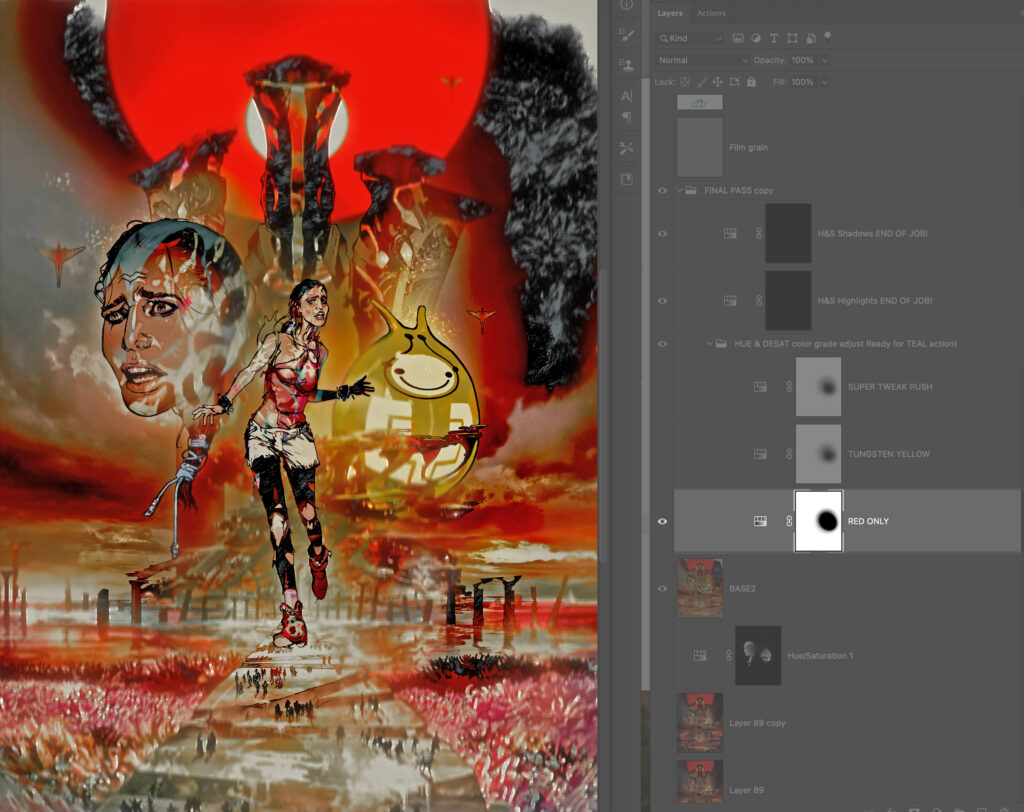
STEP 11 – Colour Grading.
The art can look a bit similar at times with a production line process being applied so this series of Actions adds Layer Adjustment variations by showing bias towards certain colours and desaturating the art. Here the reds are shown at the expense of other colours.
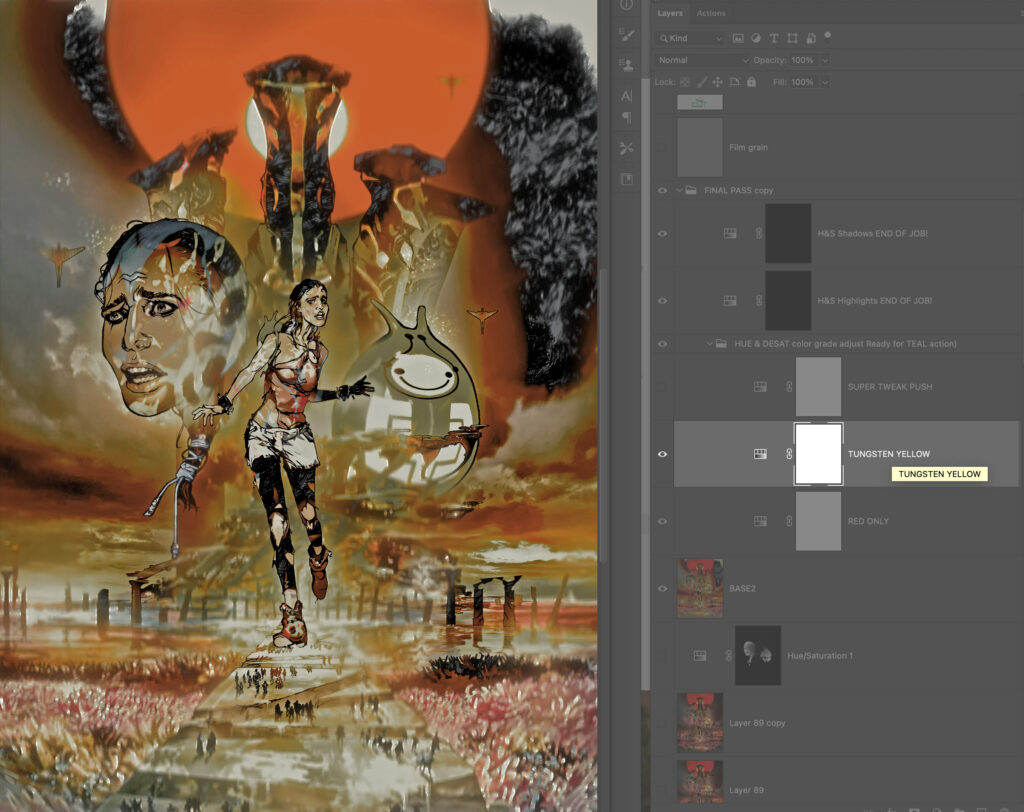
STEP 12 – More Colour Grading
Here we see the yellows are favoured. By using a combination of these Adjustment Layers I can dial back the garishness.
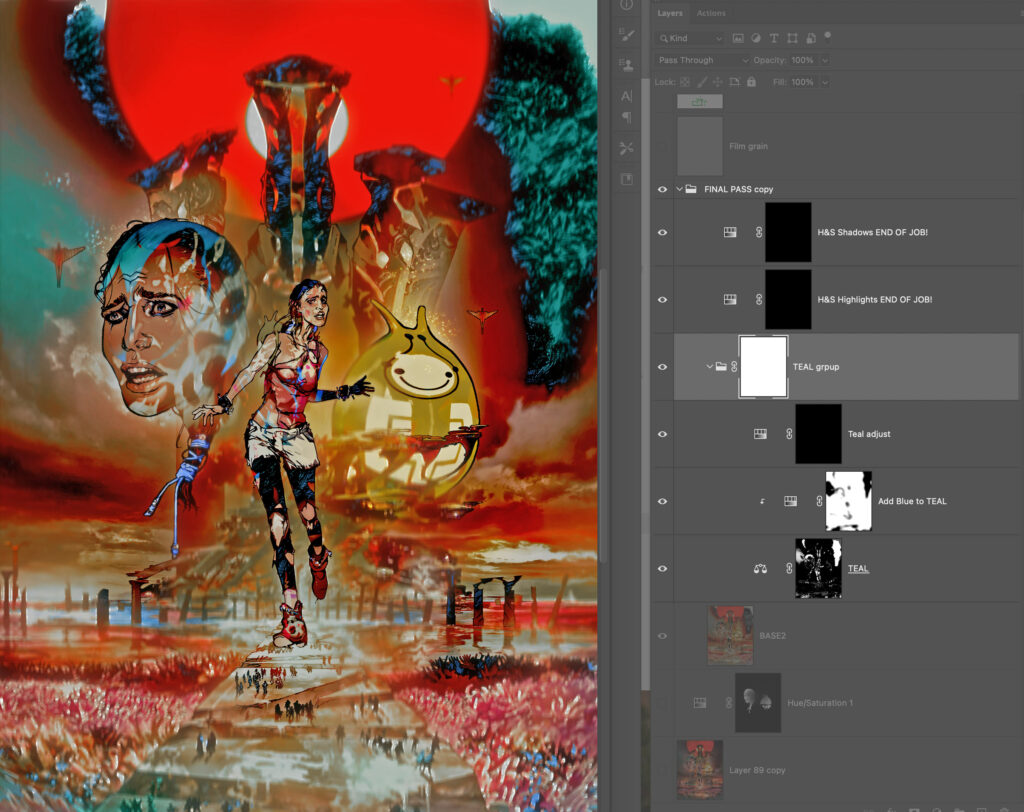
STEP 13 – Adding Teal.
Teal (a complementary/opposite colour to orange) is used in films to help flesh tones be punchier or add colour to areas of low saturation. Greyish areas are targeted and the teal colour itself is modified, pushed more to the blues where the reds are more present.
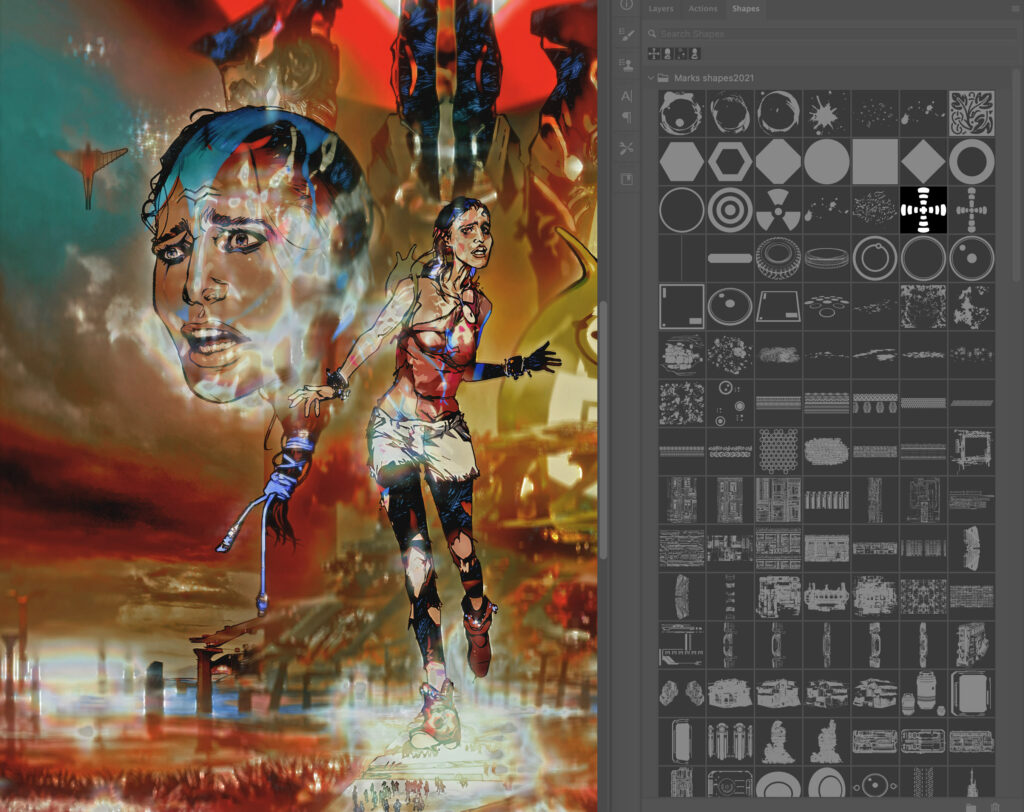
STEP 14 – Star Wars Flares (no, not the 1970’s trousers fashion.)
Fun fact: For Star Wars A New Hope, cinematographer Gil Taylor stretched nylon stockings over the lens to give the film a diffused fairy tale look, producing these in-camera effects: Cross Flares. The look is unique to A New Hope amongst the Star Wars films, the other films failing to pick up on the effect. I loved this effect; it made the film seem magical.

To replicate these particular flare effects I applied a Shape Blur Filter using a custom-made ‘Maltese Cross’ Shape as the source Shape. The effects targets copied isolated highlights on a separate Layer in Screen mode. Here is the effect full blast. The effect is also colourised to suggest a prism effect. (It took me ages to work this Action out!)
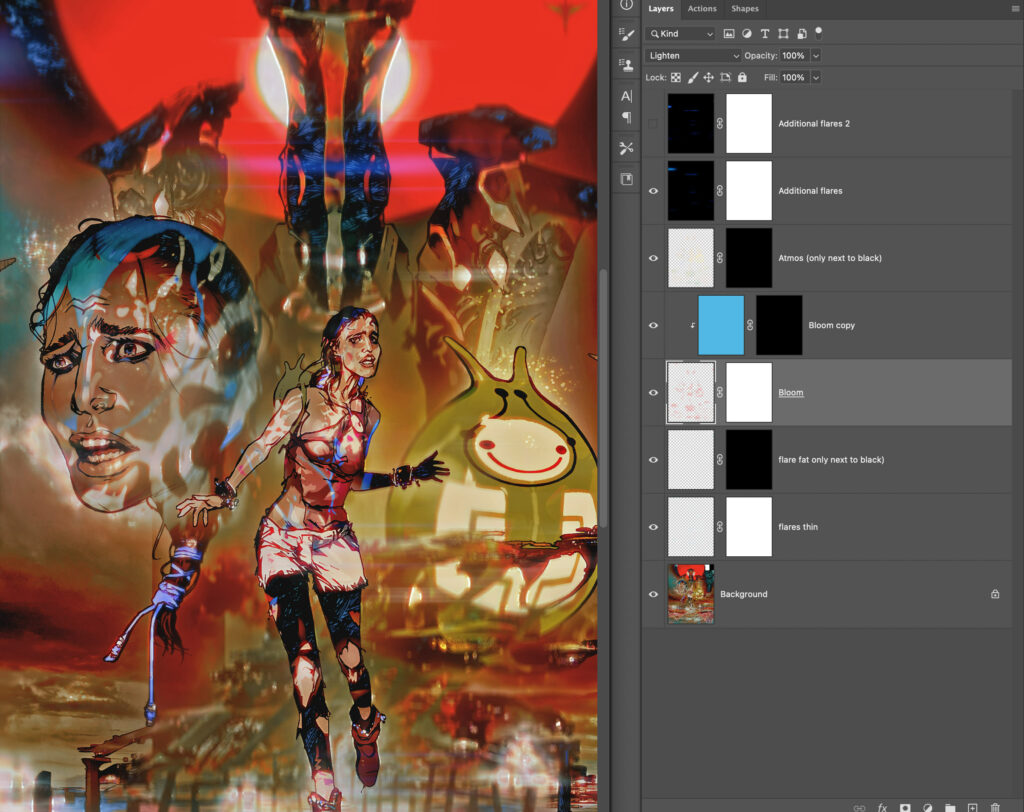
STEP 15 – The Bells and Whistles.
But that’s not it for flares, spill, and general lighting goodness! Sent to a duplicate document this is a Layer breakdown of effects including a light spill I use whenever something dark is against light. It suggests the intensity has bled into the black, emphasising the glow effect. Typically red in colour, there is a grouped blue colour to suggest a cooler light. There are also horizontal flares, again generated from the artworks highlight information.
STEP 16 – Hue & Saturation Layers
Subtle but desirable, there is a series of Hue and Saturation Adjustment Layers that adds a slight variation based on tone; oranges get pushed more to the red hues in the shadows, cyans more to blue.

STEP 17 – Final Colour Boost
A final action boosts the colour values in highlights that may have been lost.
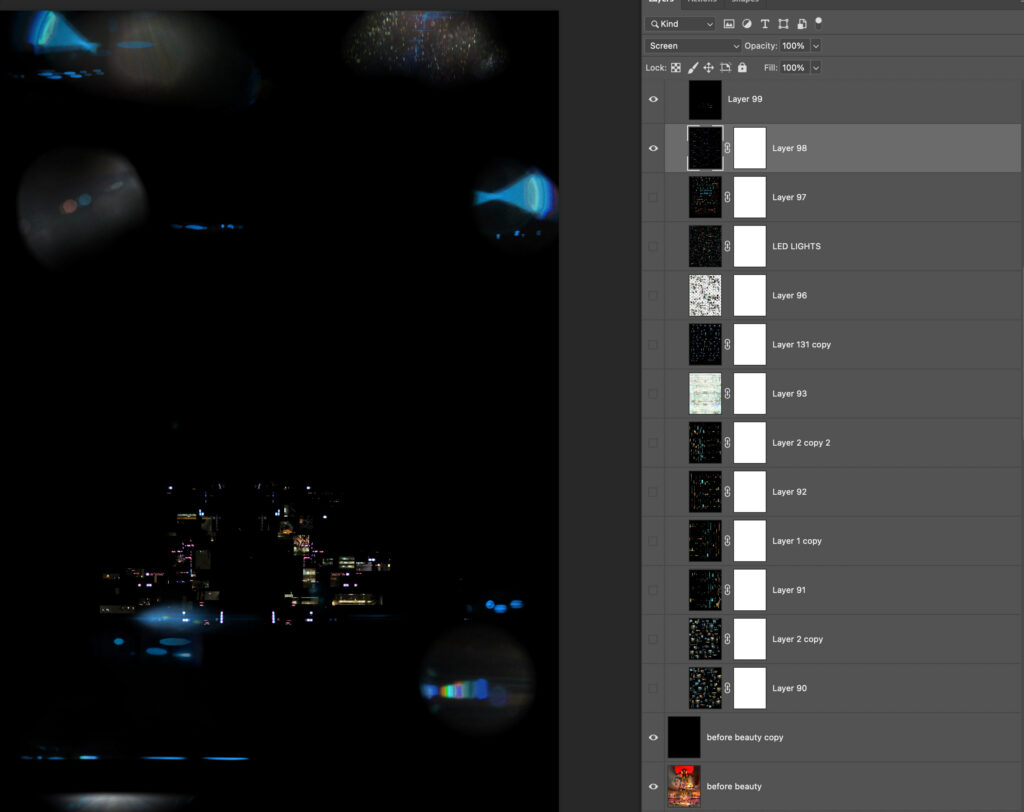
STEP 18 – Bringing Light To The Dark
Something I haven’t talked about is added art Layers such as lights and lens flares. These exist in Folders as part of the default art document I start with. They are usually edited early in the art process, in case they can inform lighting choices. Here, lens flares, city lights and some small operational lights are against black in Screen Mode.
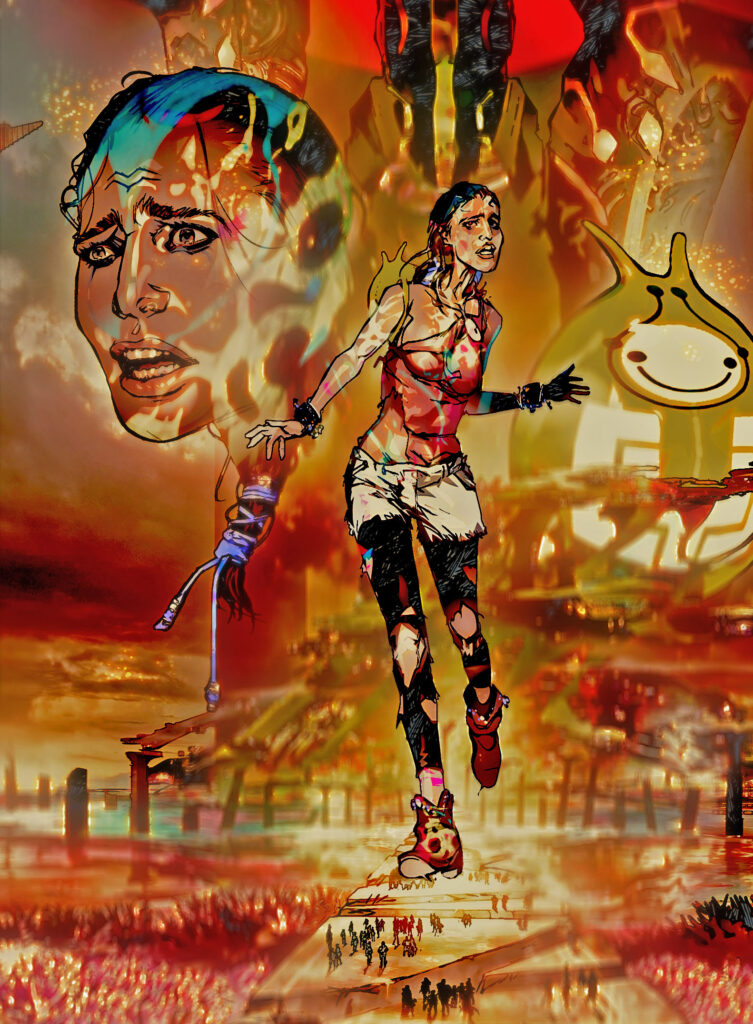
STEP 19 – Lights & flares added to the art.
The trick is to use this sparingly as it is tempting to saturate the image and strip with too many flares.
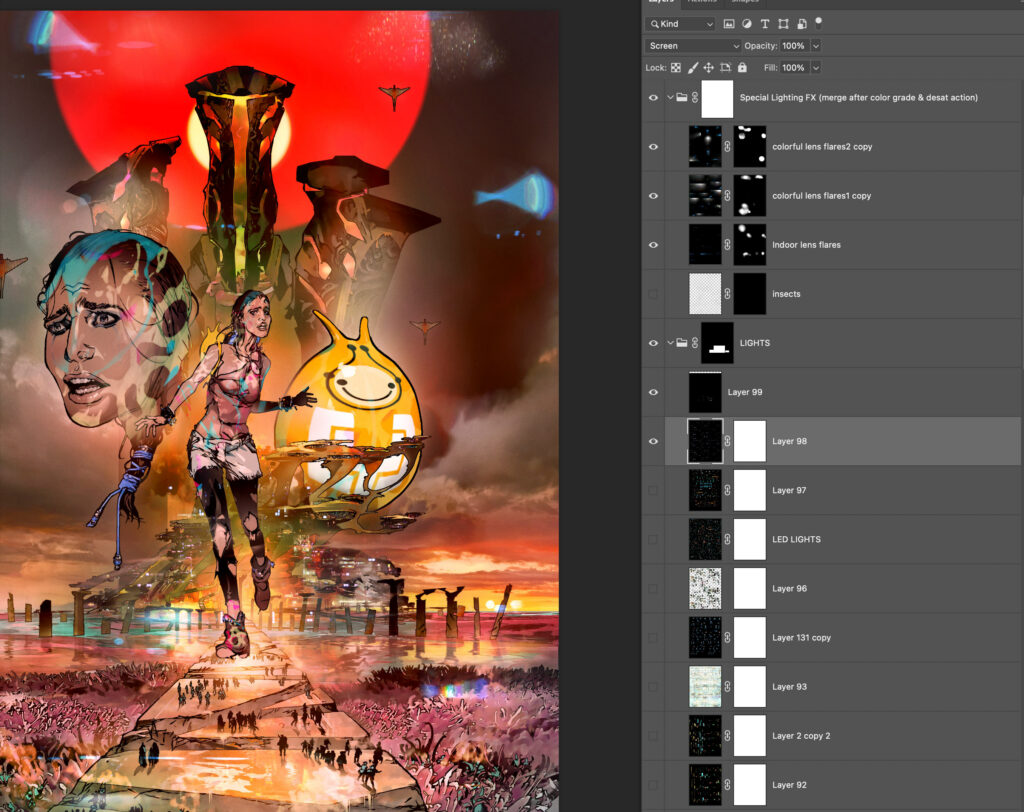
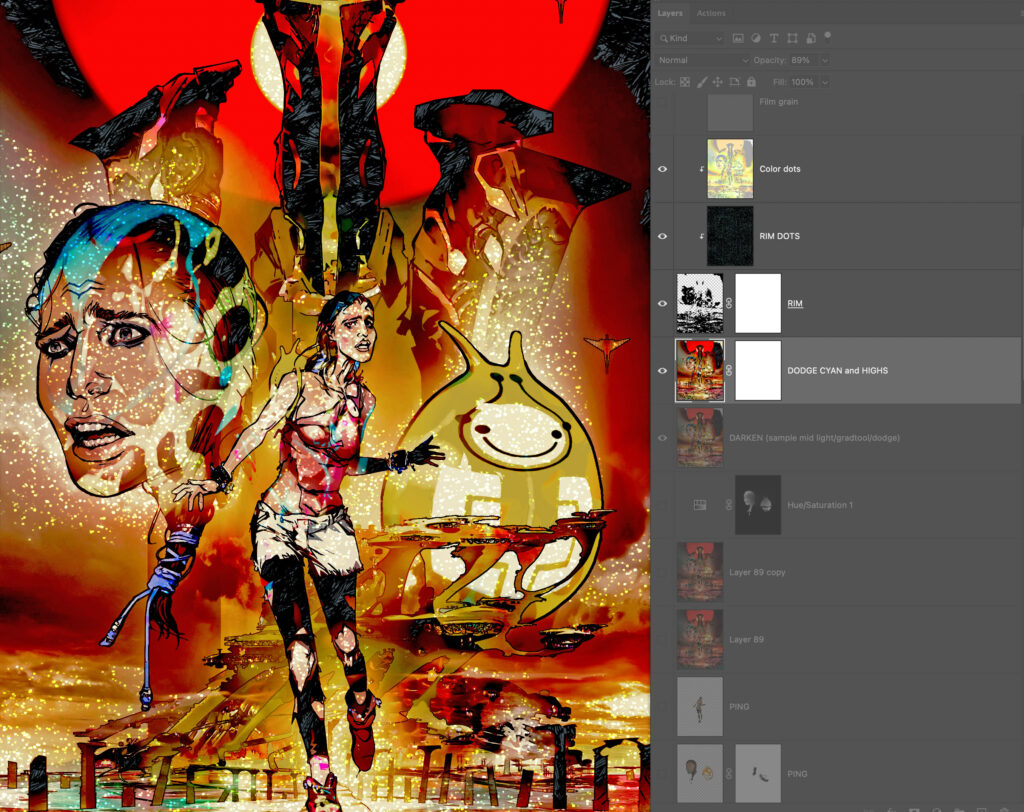
STEP 20 – Getting the glow on
There are other actions that I run to generate glowing windows or shapes, reflections (as in water) or light recesses (as seen here) that are derived from the Lights Layer.
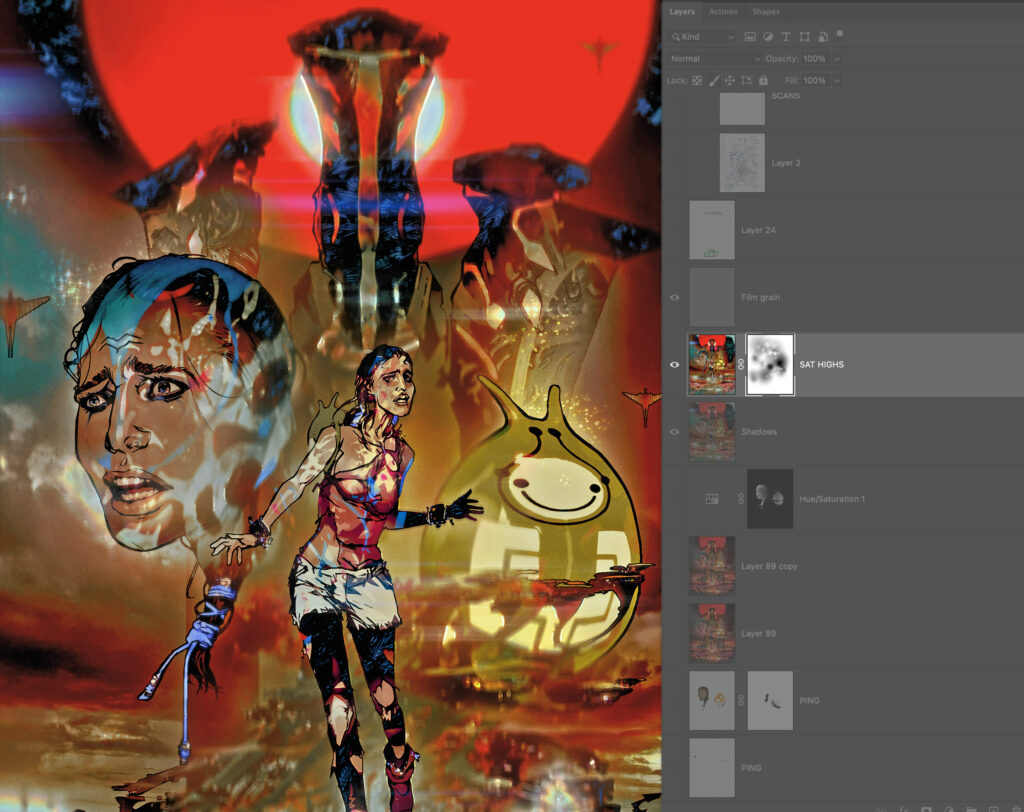
STEP 21 – The perfectionist layer
To cap it all off I add a Film Grain Layer. This is pretty much invisible in the printed comic to the naked eye but helps me in harmonising all the art while working on it.
In the sterile perfect world of the computer, replicating the noise of imperfection is a desirable look for me, so effect perfect computer-drawn lines with a Displacement Filter using a Page texture that adds tiny “wobble” and breakup to the lines, so they match my actual drawn art.
It’s unbelievably subtle and probably completely unnecessary but I’m a perfectionist… of imperfection! ??
And that’s it!
Once again, everybody give Mark Harrison a HUGE round of applause for that one – he really never disappoints with his covers or his Covers Uncovered! We’ll be back next week for the final CU of the year, but be sure to look out for Mark’s stunning cover for 2000 AD Prog 2261 in comic shops, newsagents, and from the 2000 AD web shop from 8 December!